


Mastering block sanding techniques is vital for automotive repair and restoration. This involves using specific tools like electric/pneumatic sanders and conformable blocks for even pressure distribution. Essential materials include color-coded sandpaper of varying grits, protective gear, and proper ventilation. The process begins with surface inspection, consistent pressure application, and methodical movement. Regular cleaning ensures tool effectiveness. Efficient block sanding techniques are crucial for achieving fast repair times, high-quality finishes, and customer satisfaction in competitive markets like Mercedes-Benz.
“Block sanding techniques are revolutionizing repair processes, offering a game-changer in efficiency. This article delves into the intricacies of this method, guiding you through its basics, tools, and materials. We provide a step-by-step approach to ensure optimal results. From understanding the process to measuring success, learn how block sanding reduces repair time frames significantly. Discover the art of accelerating repairs while maintaining precision. Embrace these techniques for swift and effective restoration.”
- Understanding Block Sanding Basics: Tools and Materials
- Step-by-Step Guide: Effective Block Sanding Techniques
- Measuring Success: Time Frame Considerations for Repairs
Understanding Block Sanding Basics: Tools and Materials

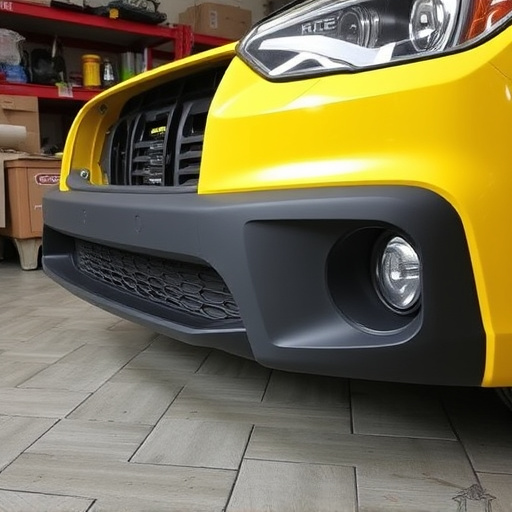
Block sanding techniques are a fundamental aspect of vehicle body repair and restoration, offering precise control over the smoothing process. To master this skill, one must be equipped with the right tools and materials. The primary tool for block sanding is a sander, typically an electric or pneumatic machine designed with interchangeable sandpaper discs. These discs come in various grit sizes, from coarse to fine, catering to different sanding stages. For efficient auto body repairs, having a range of disc sizes and textures is essential.
The materials involved include various types of sandpaper, often color-coded by grit size, and sanding blocks or pads that conform to the contours of the vehicle’s surface. These blocks ensure consistent pressure and even wear during the sanding process. By combining these tools and materials effectively, professionals in automotive repair services can achieve seamless finishes, reducing repair time frames significantly.
Step-by-Step Guide: Effective Block Sanding Techniques

Step-by-Step Guide: Effective Block Sanding Techniques
Begin by preparing your workspace and gathering the necessary tools for block sanding. This includes a high-quality sandpaper in various grits, a sanding block or pad, and protective gear like gloves and a respirator mask. Ensure adequate ventilation in the area to prevent inhaling harmful dust particles. Start with coarser grits (e.g., 80 or 120) for aggressive removal of paint defects or dents, then progress to finer grits (like 220 or 400) for achieving a smooth finish.
Follow these steps:
1. Inspect the Surface: Before sanding, carefully examine the damaged area and identify its extent. This will help you determine which block sanding techniques are best suited for your repair project, whether it’s a minor dent repair or comprehensive car paint services.
2. Apply Pressure Consistently: Hold the sanding block at a consistent angle to the surface. Apply even pressure while moving the block in small, circular motions. Avoid applying too much force, which can lead to excessive material removal.
3. Move Methodically: Sand in one direction as much as possible to minimize cross-hatching, which can create visible streaks. Keep a close eye on the surface to catch any stray debris or imperfections promptly.
4. Change Grits Accordingly: Transition between grits meticulously. After achieving a satisfactory result with coarser paper, switch to finer grits to refine the surface without introducing new scratches.
5. Clean Regularly: Periodically wipe down the sanding block and the workpiece to remove dust and debris. This ensures consistent performance and prevents ingrained particles from causing further damage.
Measuring Success: Time Frame Considerations for Repairs

Measuring success in a car body shop, whether it’s a Mercedes-Benz repair or any other vehicle repair, heavily relies on accurate time frame considerations. The effectiveness of block sanding techniques plays a pivotal role here. Skilled technicians use these techniques to meticulously smooth out imperfections and prepare the surface for painting. A well-executed block sanding process significantly reduces repair time without compromising quality.
In a competitive market, efficient repair processes are key to customer satisfaction. By optimizing block sanding techniques, car body shops can ensure that vehicles are restored to their original condition promptly. This not only meets but exceeds client expectations, fostering trust and loyalty. Time-saving measures, in turn, enable workshops to handle more repairs, thereby improving overall productivity.
Block sanding techniques play a pivotal role in streamlining repair processes, offering an efficient and precise method to achieve seamless finishes. By understanding the basics of this approach, from suitable tools and materials to step-by-step execution, you can significantly reduce repair time frames. This article has provided valuable insights into block sanding’s effectiveness, enabling you to optimize your restoration projects for quicker turnarounds without compromising quality. Implement these techniques to enhance your skill set and stay ahead in the pursuit of timely, high-quality repairs.